
Windows 11 Tips and Tricks
Back to TopWindows 11 Multiple Desktops
To create a new desktop:
-
Hover over or click on the “Task view” icon in your taskbar (it’s the one that looks like one square superimposed on another).
-
Click on the “New desktop” thumbnail.
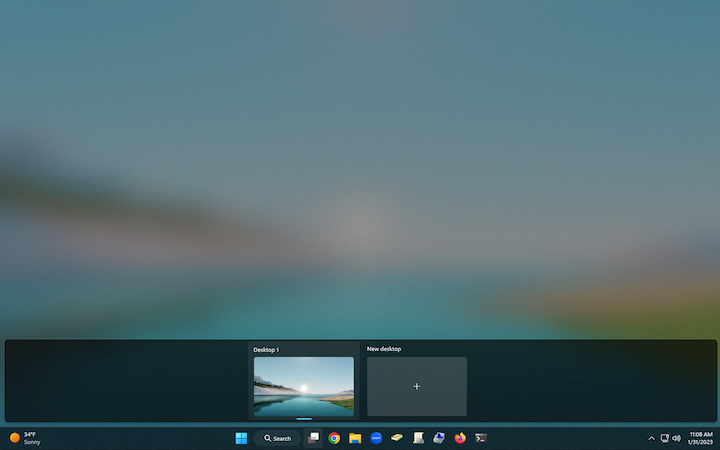
After clicking the “Task view” icon, you can create a new desktop.
You can also use key combination Win+Ctrl+D; in that case, you’ll immediately find yourself in your new desktop.
You can now place different apps in your separate desktops. Move from one desktop to the other by clicking the “Task view” icon. (You can also move around by using the familiar Alt-Tab key combination, which will take you to all the apps in one desktop and then to the apps in the next.)
To remove a desktop:
-
Hover over or click the “Task view” icon.
-
Hover over the virtual desktop you want to remove and click the “X” in the upper right corner.
Windows 11 Taskbar Personalization
You can change the Windows 11 Taskbar alignment by adjusting the feature settings to access the Start menu and other icons from the “left” side.
Windows 11 includes an updated version of the Taskbar that aligns all elements to the center of the screen. While this makes it easier to reach the Start menu and applications (especially on large monitors), many users still prefer the Taskbar with items aligned to the left.
To align apps icons to the left side of the Taskbar, use these steps:
-
Open Settings on Windows 11.
-
Click on Personalization.
-
Click on Taskbar.
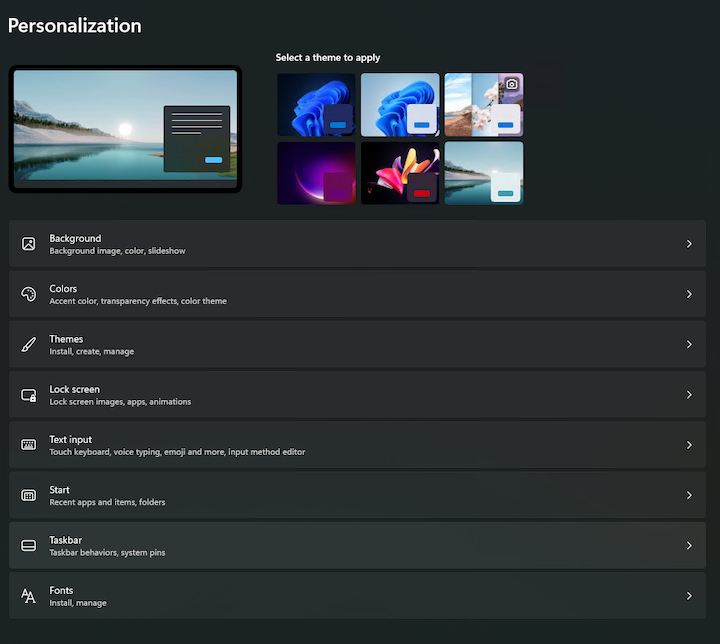
- Click the Taskbar behaviors option.
- Use the “Taskbar alignment” setting and select the Left option to align icons to the left side.
Data Health Check-up
Back to TopThere are many ways individuals manage and store their data at the UW and within the College of Arts and Sciences.
Our laptop systems (Mac and PC) and not by default "backed up" anywhere. Your data is only secure if you ensure you are setting up a service to Sync your data to the cloud, or if you choose to, backing up your data regularly to a Shared Drive (M drive) or an external Hard Drive.
The simplest solution to backing up your computer data (Desktop, Documents, etc) is to use Microsofts OneDrive solution. OneDrive details can be found here.
To setup Sync and back up, follow these steps:
-
Open OneDrive settings
-
Select the OneDrive cloud icon in your notification area.
-
Select the OneDrive Help and Settings icon then Settings.
-
Select Sync and back up,
-
Select Manage Back up.
-
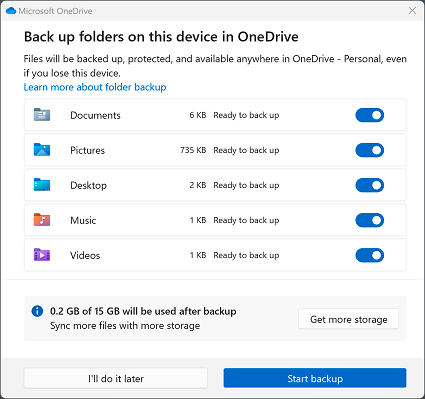
Select the folders you would like included in your OneDrive.
-
When you stop backing up a folder, the files that were already backed up by OneDrive stay in the OneDrive folder, and will no longer appear in your device folder.
-
If you want those files back in your device folder and not in OneDrive, move them manually from the OneDrive folder back to your device folder. Note that any new files you add to that folder on your device won't be backed up by OneDrive after you stop the backup.
-
To move the files, select Where are my files to open the folder in OneDrive, then select the files that you want to move to your device folder, and drag them to that location.
-
-
To start backing up a folder, select any folder that doesn't say Files backed up, and then select Start backup.

If you configure OneDrive correctly, it can sync your files across devices, in essence creating a copy of your files in the cloud. It is important to recognize, this is indeed not a traditional backup - as the files must remain on a computer system. So, f.ex. If you delete the file from your desktop, the file will be deleted from all your OneDrive locations and no longer available to you.
Schedule Emails with Outlook
Back to TopYou can delay the delivery of an individual message or you can use rules to delay the delivery of all messages by having them held in the Outbox for a specified time after you click Send.
-
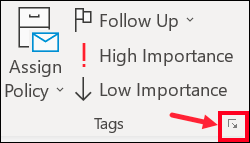
While composing a message, select the More options arrow from the Tags group in the Ribbon.

-
If you don't see these options, you probably have the simplified ribbon: On the ribbon, select the Options tab, then select More commands > Delay Delivery.
-
-
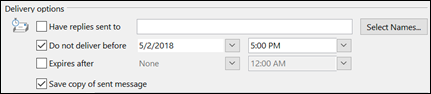
Under Delivery options, select the Do not deliver before check box, and then click the delivery date and time you want.
-
-
Click Close.
-
When you're done composing your email message, select Send.

After you click Send, the message remains in the Outbox folder until the delivery time.
If you decide later that you want to send the message immediately, do the following:
-
Switch to the Outbox folder.
-
Open the delayed message.
-
Select the More options arrow from the Tags group in the Ribbon.

-
If you don't see those options, you probably have the simplified ribbon: On the ribbon, select the Options tab, then select More commands > Delay Delivery.
-
-
Under Delivery options, clear the Do not deliver before check box.
-
Click Close, then click Send.

Note: Outlook must be online and connected for this feature to work.